Collapsed Ear Canals : Making Earmoulds

Collapsed Ear Canals: Earmould impressions and hearing aid issues

Collapsed ear canals can be problematical when it comes to getting a well-fitting ear mould. The canal can neither be too long or too short. If either, then the earmould will be pushed out of the canal with jaw movement. A study in Brazil from 2017 suggested it occurs in on an average in 11% of clients. Statistically, they found it was between 3% – 36% across age groups with the largest percentage in individuals 75+ . Males are more likely to suffer from canal collapse.  Ear canal collapse prevalence & associated factors among users of a centre of prevention and rehabilitation for disabilities 

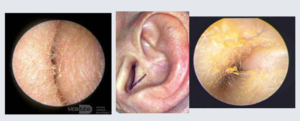
                                   So how do you know if the ear canal is collapsing ?                                        As shown in the 2nd image above.

Firstly, when doing otoscopy, we always look behind the ear for scars. Then we look straight into the canal. Often without first truly observing the canal and concha. I always tell my students to put some light pressure on the pinna to look to see if the ear canal is still remaining open. A collapsing canal will close further with just a little pressure, it will become a very narrow slit.  You then know you have a collapsed canal.

Clients with collapsed canals may be more prone to wax accumulation (as it can’t exit the ear easily) but more importantly they may have issues with keeping hearing aids in their ears.

Open Fits/ Receiver-In-The Ear fittings with collapsing canals?

The client may be new to hearing aids and they wish to try an Open Fit or Receiver-In-The Ear with a dome; if their hearing loss allows. Or they already have  hearing aids and prefer this option to an earmould.  All you can both do is try and see if this works.

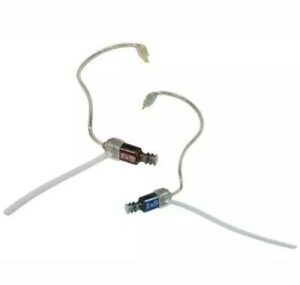
Be aware that you will need to have a trailing arm/tail on the wire to ensure that the wire and dome don’t push themselves out when the client speaks. See below image of what this tail looks like. I always say to these clients that this type of fitting may not work and you may need an earmould if we find it keeps pushing itself out. (This saves them having unrealistic expectations and getting upset when things don’t work)

So, they need an earmould … What advice would I give you?

When it comes to everyday impressions most earmould manufacturers preferred a closed jaw impression (the client doesn’t talk or move their jaw whilst the impression is setting).

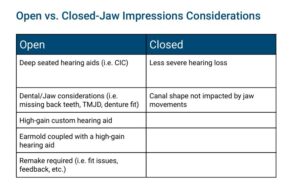
This is fine when the client has a normal shaped canal or their canals are not highly mobile. However, as Ahead Simulations chart Earmold Impressions – AHead Simulations shows below you should always consider doing open jaw impressions if you have any of the below issues.

It is strongly advisable to take on open jaw impression for ears with collapsed canals, or highly mobile canals. In fact, I would suggest where you are up to your 3rd remake, comfort has been an issue or you know the canal is very mobile, then make both open and closed jaw impressions. Then the manufacturer can compare the two.

Also THINK! I made the mistake once of making sleep plugs for a client and not realising that she wore a mouth guard when sleeping. The sleep plugs didn’t work at all! I then made an open jaw impression which was consistent more with the shape of her canal when the mouth guard was in and hey presto it was a good fit! (she brought her mouth guard in to the 2nd appointment)

If the client wants a canal mould for a collapse canal, then the mould requires an anchoring point like a claw/spur as shown below.

How do I take an open jaw impression?

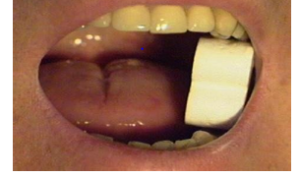
In order to take an open-jaw impression, a client opens their mouth wide using a bite bar before the impression material is injected. Keeps the bite bar in their mouth and this is not taken out till the impression material is fully cured.

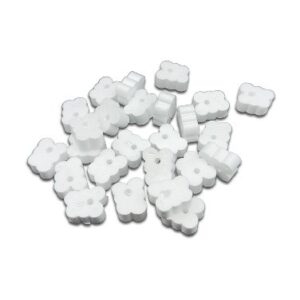
A mouth prop can be bought from Impression Bite (25 Pack) – Puretone Shop

The recommended method according to the British Society of Audiology (BSA) is to insert the prop lengthwise in the corner of the mouth at the side the impression is taken as shown above. ‘For this process a dental mouth prop or bite-block should be placed between the subject’s side or rear teeth, after the otostop is inserted. (Reproduced with permission of Starkey Laboratories) A new and clean mouth prop should be used for each subject. The position of the otostop should be checked carefully using an otoscope when the mouth prop is in place to ensure there are no gaps between the otostop and the canal walls. The subject should be given a tissue to deal with any dribbling when the mouth prop is in place. Once the impression is set the mouth prop should be removed first. As the impression is likely to be a tight fit, extra care is required to ensure it is removed safely. With an open jaw it is particularly helpful if the subject moves their jaw gently from side to side during its removal’. (BSA Recommended Procedure 2023 Aural Impression Taking)

What next?

It may be a good idea to also make a closed jaw impression as well so the mould manufacturer can compare the two. Some people also do talking/moving jaw impressions, the thought is that the shape of the canal will be somewhere in between the two and give a more truthful impression of the ear canal.

At the moment it isn’t enough evidence to indicate whether there is a benefit to talking impressions over open jaw, so we are best to stay with the BSA recommendation of doing open jaw.

Basically, the rule of thumb is if they have had issues getting good moulds in the past, have collapsed canals or flatten conchae, or they have overly mobile canals (can check when doing otoscopy or they may have jaw issues that they have told you about) then do an open jaw impression.

Let the mould manufacturer know that is an open jaw impression, write as much information on the impression sticker to let them know of the issues (they don’t have a crystal ball) and then send on, and hopefully you should get a good earmould back that your client is happy with.

Lastly……

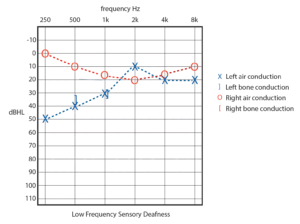
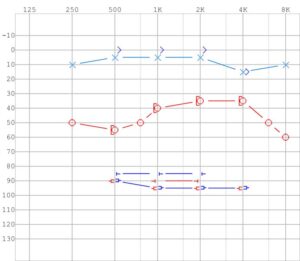
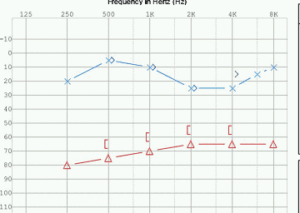
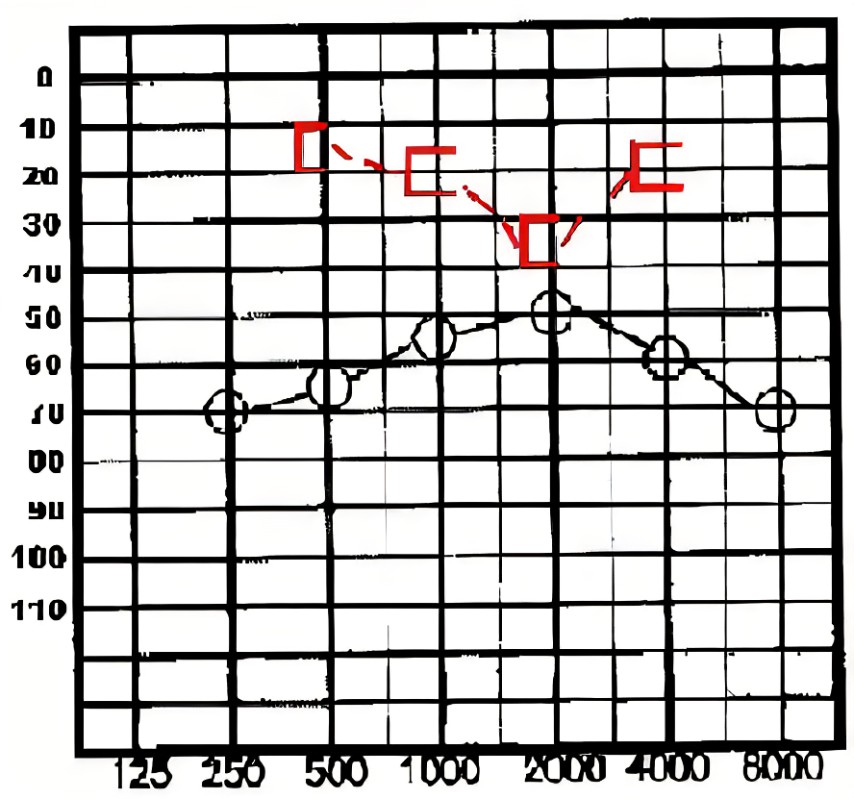
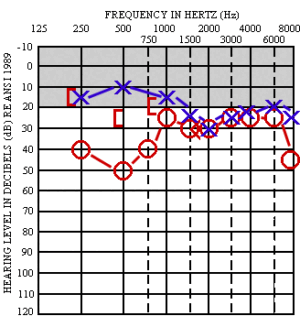
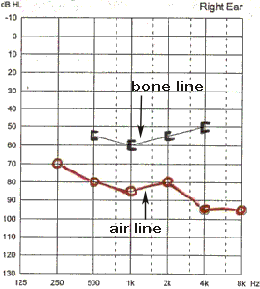
At some point soon will be a blog from me on canal collapse and the audiogram. I honestly believe this is an issue that is far too often missed by audiologists and audiometricians, resulting in clients being unnecessarily referred (and embarrassingly so) onto Ear, Nose and Throat Surgeons. Be prepared….. as I will definitely be on the soap box screaming on this subject!

How to write an audiology report for other medical/allied health professionals

This may seem a strange blog to write for an audiology training provider. However, if we are training you to provide an audiology service; then at some point your audiology service will need to write a report to someone, either to inform them of what you have done or to refer onwards for further assessment/intervention.

Once you have informed the person who you are sending the report to then the onus of responsibility is no longer fully on you. Asking a client to see their GP, ENT, audiologist, paediatrician or other allied health professional with your verbal direction of what is needed, isn’t good enough. The client or the other individual (e.g. GP) may not heed this request. A court of law will indicate that a verbal request isn’t sufficient; even if you have written in your notes that you made one and specified what was required .

Remember you will need approval from your client to write the letter as well. You cannot send a referral letter without their consent.

Who to write to?

Unless you have direct access to ENT or an audiology department or provider (UK) then all letters should be directed to your GP who will refer onwards to other professionals such as neurology, psychology etc. You may be able to directly send a report to other allied health professionals such as speech therapists. Remember to check what the local protocols are if you are NHS and if you are a private practitioner you can often directly refer to other private health professionals such as ENT and speech therapy, however for example neurology will require a GP letter even for private appointments.  See below how the start of your letter should be.

Dr ………

Address…………

……………………

……………………

                                                                                                                                                                                Date:

Dear Doctor

NAME:

ADDRESS:

DOB:

NHS No: (if you have it)

Then start with a bit of history. Why they had attended the appointment and the date of the appointment. What is the problem they came for? Medical and otological (ear history) that is relevant to the appointment. For example for a hearing test appointment

 ‘was seen seen on 12.11.24 due to concerns about their ability to hear, particularly on the left ear. They have bilateral tinnitus (non pulstatile) for some years, but have habituated to this. They do not have any vertigo and there is no family history of hearing loss or previous history of ear problems .As you know they had a stroke in JUNE 2016, and have indicated that speech now takes them longer to process.’

You always need to describe any ear related history, is there any balance issues if so describe the issues that they have (remember try and be concise as the GP or ENT) will want a succinct easy to read letter). Do they have tinnitus, if so is it one ear or both. Is it pulsatile or not? If it is unilateral or pulsatile both of these are red flags and referral onto ENT for investigation is required. Is there any family history of ear problems or have they had any ear problems such as ear infections , ear nose or throat operations etc? Also add any relevant medical history that you feel may be important for them to know or acknowledge may be relevant.

Next describe what you saw and did

‘Otoscopy showed both ears have a slight amount of non occluding wax. It is worth noting that both ear are fairly narrow.

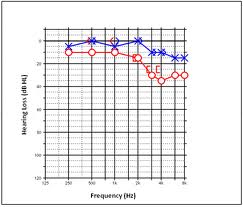
Pure tone audiometry showed a bilateral mild to moderate sensorineural hearing loss with right thresholds slightly worse than left.  (inserts were used due to narrow canals). Speech testing was consistent with the hearing test, indicating when speech words/sentences where presented loud enough to compensate for the hearing loss the client was able to understand speech words well. Tympanometry showed normal middle ear function/Movement in both ears.’

The above example is for a hearing test appointment. If it is a balance or tinnitus appointment you need to describe the test you did. What it was you were looking for; what is the normative data for the age of the person you have seen. Or what the numbers mean when compared to the normative data.  Remember that your reader may not have the knowledge that you have.

After you have described what you have found. They need to know what you want them to do and what you are doing.

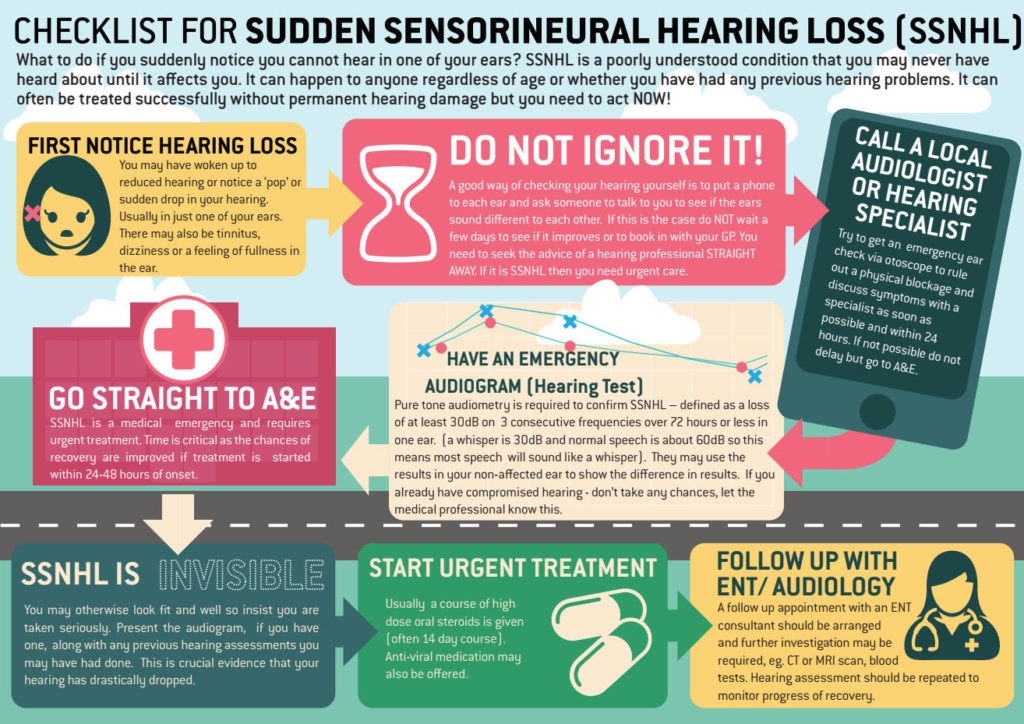
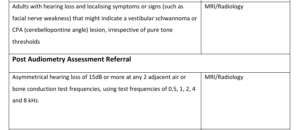
‘ The above findings indicate an asymmetry/difference between left and right ears. According BAA Onwards Referral Guidelines this difference between thresholds requires onwards referral to ENT to investigate the cause of this asymmetry’.

…. has indicated that they would like to go ahead with NHS hearing aids and this is now in process.

Of course, finish with yours …. and your name and qualifications and if the letterhead doesn’t have contact details, then add these to your name.

Remember  to add the audiogram either in the body of the letter or specify at the bottom that it is attached to the letter. For other letters if you have images, attach these as well or indicate that they will be attached electronically, if you are emailing the letter. Under all your details if you are sending a copy to the client or anyone else then add a CC: with the name and relevant details: eg clients name or a consultant’s name and their hospital.

If you are emailing remember that you must use an encrypted email and most professional organisations will also have encrypted email (I often state this in my email) and ensure that you have the correct email address before sending. It is an information governance breach if it is sent to the wrong address.

For BAA Onwards referral guidelines please Onward-Referral-Guidance-for-Adult-Audiology-Service-Users-Sept-23.pdf

OTITIS EXTERNA

As you know Wax Removal is now one of the courses we run at TJ Audiology Training. This blog is about what Otitis Externa is; how to spot the signs and what to do, if you are removing wax, about to take an impression or to do a hearing test.

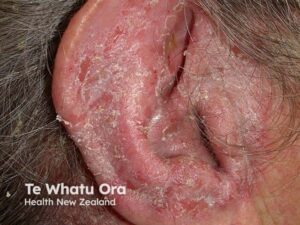
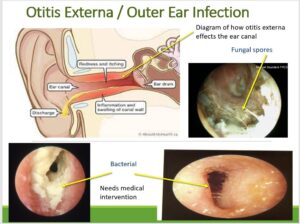
What is otitis externa? Firstly, it’s in the name Otitis is Latin for ear and Externa is external ear and it is an inflammation/infection of that area (generally it just the ear canal).  Some people call it swimmers’ ear. But be aware this can mean something different depending on the region you live in the UK or what country you are in.

What causes Otitis Externa?

We aren’t exactly sure but some of the possible causes are:
  • Damage to the skin in the ear canal (caused by cotton buds, scratching or poking) can cause inflammation and infection.
  • Water can get into the ear canal during swimming. The stagnant water triggers an infection (Remember all water contains pseudomonas bacteria) . This often happens if there is a lot of wax and the water gets stuck behind the wax.
  • Hot, humid weather makes inflammation of the ear canal more likely to develop.
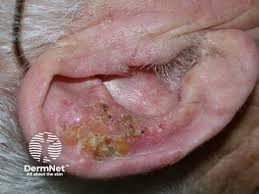
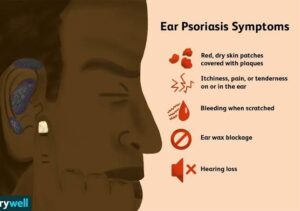
  • Skin conditions such as eczema, or psoriasis, can make someone more likely to get problems with the ear canal.
  • Diabetes, radiotherapy (near the ear) and immune and conditions that effect the immune system can also make the client more prone to infection

How to spot the signs?

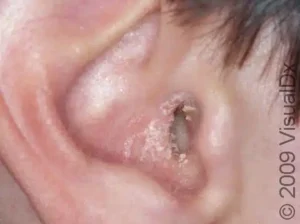
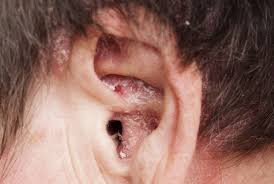
  • In general the first sign your client will complain of is persistent itchiness and dry flaky skin around he canal and their may be some redness too.
  • Smell – this like off cheese or smelly socks (it stays with you when you smell it!)
  • A watery discharge from the ear canal (this can change later when its whiter)
  • Discomfort moving the jaw when chewing or speaking.
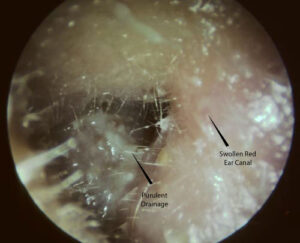
  • The ear canal starting to close up due to swelling and inflammation.
  • Reduced hearing due to the canal being full of discharge or the canal is completely swollen
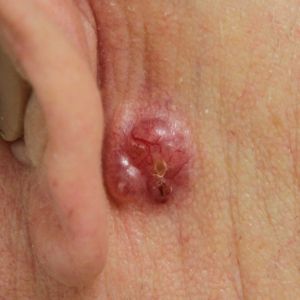
  • Fungal spores are also a form of otitis externa. These will be either white and furry or black (see picture below)

What should you do as an ear care professional?

Firstly, if they are seeing you for ear impressions or a hearing test, then you need to send them away. The swollen canal will prevent an accurate impression and you can’t do a hearing test as the risk of cross infection is too high.

What if they are seeing you for wax removal?

It may be that you can’t see it or smell it till you have removed some wax. If this is the case then remove as much as you can comfortably for the client. This will give any intervention a better chance of working, as you have made the canal clear of as much debris and discharge for antibiotics to work on the skin. Remember the ear may be sore so you may have to work slowly and gently and you not be able to remove all of it. (Please note irrigation is not an option here only microsuction; as water from irrigation will make things worse).

Remind them of good aural hygiene. No water near the ears and no touching of the ears whatsoever.

Once you have removed the wax and discharge, refer the client to the GP. They may prescribe eardrops or spray. Often, it’s a combination of an antibiotic to treat any infection, and a steroid to reduce the inflammation and itching. The treatment usually lasts for 7 to 10 days. They need to follow the prescribed course. If they return to you because the treatment hasn’t worked, then you need to recommend that the nurse or GP take a swab sample, as the antibiotics may be the wrong type for the bacteria present. To understand the prescribing pathway otitis-externa-acute-and-chronic.pdf  (Edit 9.1.25)from Nottinghamshire Area Prescribing Committee is a very helpful document. 

Edit 9.1.25 Outer ear infection or otitis externa ENT UK is a useful sheet to give to clients.  

Lastly

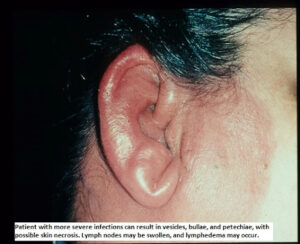
If the canal is swollen shut and the pinna and the concha are also swollen then the otitis externa has developed into cellulitis, this is a rare occurrence/side effect . (This may have occurred due to the client scratching the already infected ear and adding another bacteria). They will require intravenous antibiotics for this, so in this case suggest they attend A+E as this cannot be given at a GP surgery.


Cochlear Anatomy

Personally my mind boggles when it comes to this subject. Cochlear anatomy is amazing and the cochlear itself is so tiny only 36mm in length and yet it does so much. Whilst there are many good explanations out there, anatomist Dr Sam Webster description from Swansea University is one of my favourites. Watch his video below for more information on cochlear anatomy. Be prepared to get a cup of coffee or tea and set 30 minutes aside to watch his explanation!

Whats new with TJ Audiology Training

Its been a long while since we have posted a blog!!!!!!!!

TJ Audiology Training as you may have noticed has changed its name ever so slightly and we now have a new a fantastic new logo.  Watch this space for new developments  in the next 6-12 months. Like our new wax course Ear Wax Removal/ Aural Care Course

We will be running the wax removal course again on 22nd -23rd January 2025; with volunteer human ears to practice on too! Our students loved the September course which we ran using equipment from  Puretone   so please get in touch if you would like to know more.

The structure and function of the ear and its role in hearing and balance

Although the ear is small in size, it is essential for hearing and balance, and problems of the ear can be linked to other conditions. Understanding the structure and function of the ear will help us to pick up problems early and improve the care of patients with ear problems.

Here’s a very helpful article published in the Nursing Times which explains about the ear and its role in hearing.

Personally my mind boggles when it comes to this subject. Cochlear anatomy is amazing and the cochlear itself is so tiny only 36mm in length and yet it does so much. Whilst there are many good explanations out there, anatomist Dr Sam Webster description from Swansea University is one of my favourites. Watch his video below for more information on cochlear anatomy. Be prepared to get a cup of coffee or tea and set 30 minutes aside to watch his explanation!